What is Arduino? What are their properties and where are they used?
What is Arduino?
Arduino; In short, it is an open source electronic card that you can write, compile and enrich with different hardware. The microcontroller has USB input and input / output connectors.
The open source of a hardware allows you to develop it for additional operations with additional hardware parts and to produce the desired product. It has its own IDE. With this IDE, you can encode the processes you want to be performed on your computer and transfer it to your Arduino card via USB connection. You can download IDE for free by clicking here. If you already have coding skills, you will get used to it very quickly. If you’re going to learn, you’ll become familiar with a few applications and then start writing code yourself. So it has a simple programming structure.
Microprocessor on Arduino development board (AtmegaXX)
Programming with Arduino programming language (wiring based)
It is installed on the board with the help of Processing-based Arduino Software Development Environment (IDE).
What can be done with Arduino?
Design systems that can easily interact with the environment,
You can easily program microcontrollers with Arduino libraries,
With analog and digital inputs, you can process analog and digital data,
You can use data from sensors, (Humidity, temperature, light sensors, etc.)
You can produce outputs (sound, light, movement, etc.) to the outside world.
Sample projects;
Automatic flower irrigation project with moisture sensor
Remote controlled vehicle
Talking tree project
Obstacle robot
Azan reciting clock project
etc. You can realize any project according to your imagination.
Arduino Basic Equipment
These hardware features show different features compared to the board.
ATmega8, ATmega168, ATmega328 microprocessor
5 volt leveling integrated,
16MHz crystal oscillator or ceramic resonator,
Flash Memory,
SRAM
EEPROM
Hardware specifications for Arduino UNO are as follows;
- Microcontroller: ATmega328
- Operating voltage: +5 V DC
- Recommended supply voltage: 7 – 12 V DC
- Supply voltage limits: 6 – 20 V
- Digital input / output pins: 14 (6 of them support PWM output)
- Analog input pins: 6
- DC current per input / output pin: 40 mA
- Current for 3.3 V pin: 50 mA
- Flash memory: 32 KB (0.5 KB is used for bootloader)
- SRAM: 2 KB
- EEPROM: 1 KB
- Clock frequency: 16 MHz
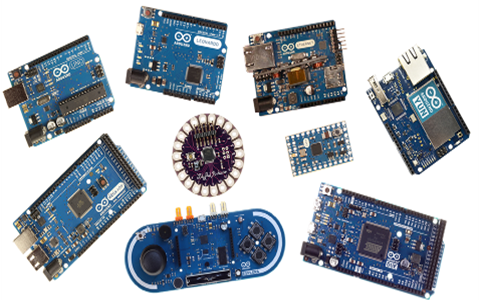
Arduino Boards
1. Arduino Uno
2. Arduino Leonardo
3. Arduino Due
4. Arduino Yun
5. Arduino Tre
6. Arduino Micro
7. Arduino Robot
8. Arduino Esplora
9. Arduino Mega ADK
10. Arduino Ethernet
11. Arduino Mega 2560
12. Arduino Mini
13. LilyPad Arduino USB
14. LilyPad Arduino Simple
15. LilyPad Arduino SimpleSnap
16. LilyPad Arduino
17. Arduino Nano
18. Arduino Pro Mini
19. Arduino Pro
20. Arduino Fio
A Simple Led Lighting Application with Arduino
IDE offers an interface for arduino where we can write our commands. Thanks to this program, we will be able to write our commands and transfer them to our arduino.
First, connect the Arduino to your computer with your USB cable.
In the IDE you will see two blocks: void setup () and void loop ().
In the void setup () block, commands are written for the first operation when the arduino is first started or when the system is reset. At this stage, we can send energy to our pins or receive data back from our pins. We wouldn’t have made a mistake if we looked like a door here.
In the void loop () block, after arduino is opened, we will write our commands that will run continuously or be updated. The actual operations are performed here.
The connections between Arduino and Board should be designed as follows.
A cable must be connected to the board – side of the Arduino GND output … The only leg of the LED will be fed here.
The second cable must be connected from the 5th pin of the Arduino and coincide with the other leg of the led. (It is necessary to prevent the LED from being lit because it absorbs the excess electricity that will go through an ohm once in a while. But not using ohms does not mean that the LED will be lit.)
Thanks to the code below, we will turn on the LED connected to pin 5;
void setup() {
// Energy output to pin 5
pinMode(5, OUTPUT);
}
void loop() {
//Pin 5 Active
digitalWrite (5,HIGH);
//Continue processing for 1 second
delay(1000);
//Pin 5 Pasif
digitalWrite(5,LOW);
delay(1000);}


Leave a reply